
How to Set Up a Small Craft Corner in a Tiny Apartment

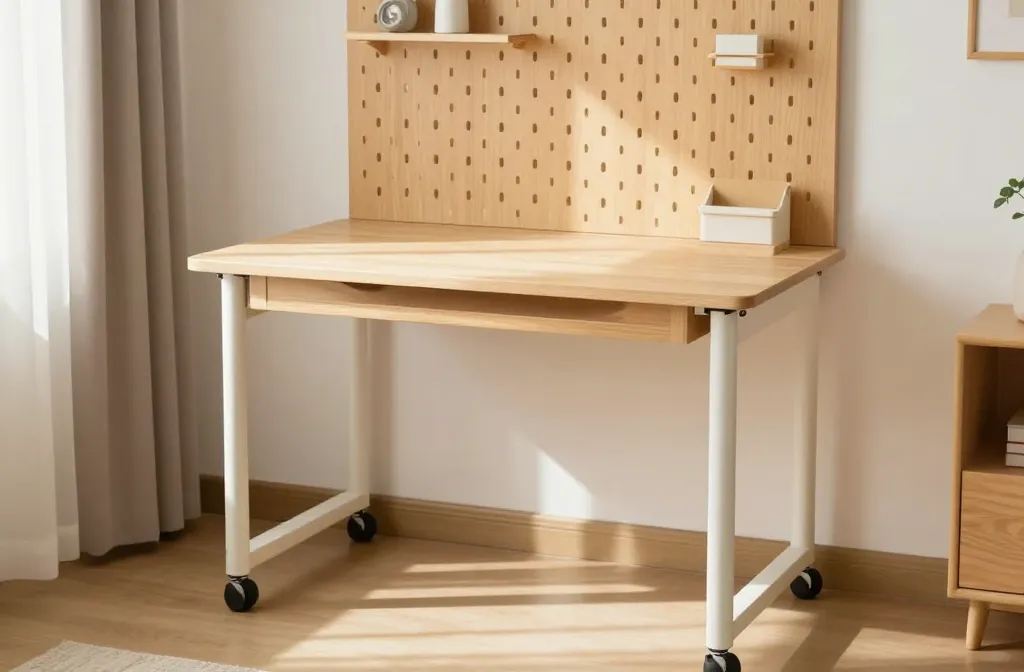
An idea that seems big in a tiny space? Let’s make it happen. You don’t need a dedicated studio to scratch that creative itch. With a smart plan and a dash of DIY charm, your craft corner can feel like a cozy harbor, not a cluttered closet. Ready to dive into the world of tiny-authored masterpieces? Let’s go.
1. Map Your Space Like a Pro
Is your apartment more Zen garden or chaotic studio? Start by sketching a quick map of your room. Place a small craft table where you naturally pause—near good light, ideally. Think vertical real estate first: shelves, peg boards, and hanging pots for tools free up precious desk space. FYI, corners are your best friends here.
2. Pick a Core Setup That Grows With You
Your goal: a flexible station that can morph from sewing nook to watercolor desk in a heartbeat. Choose a compact table or a drop-leaf setup to save space. Pair it with a rolling cart for supplies—easy to move, easy to disappear. Keep essential tools within arm’s reach and store the rest out of sight. It’s all about visual calm.
Subsection: The Devil’s in the Details
– Use a small, stackable organizer for beads, threads, or brushes.
– Invest in a good desk lamp with adjustable color temperature.
– Label bins so you don’t play hide-and-seek with your own supplies.
3. Vertical Storage Wins the Day
Shelves aren’t just for books. Install wall-mounted shelves to free up table space and show off your favorite project remnants. A pegboard above the desk holds scissors, rulers, and spools in reach. Whenever you hit a block, glance up; the sight of finished or half-finished projects can spark momentum.
Subsection: Pegboard Power Moves
– Use different hooks for different tool families (scissors vs. brushes vs. brushes).
– Add a small corkboard section for inspiration notes or color swatches.
– Keep everyday tools on the bottom row for quick grabs.
4. Light It Right, Live It Right

Natural light is priceless, but not always reliable. If you don’t have a sunny window, invest in a good daylight lamp. A well-lit corner reduces eye strain and makes colors pop, which is crucial for projects like painting or embroidery. Warm to cool light transitions help you shift mood as you switch tasks.
5. Comfort Is Non-Negotiable
Tiny spaces tempt you to sit on a hard surface and suffer. Swap to a comfortable chair and a cushioned mat for longer sessions. Add a small footrest and a supportive chair height to keep your back happy. FYI, you’ll thank yourself after a marathon crafting session.
6. Create a Clear Buffer Zone
Set a boundary between “craft space” and “living space.” A curtain, folding screen, or even a tall plant can delineate. This separation helps you switch off when it’s time to relax and reduces the temptation to dump laundry into the craft corner. It also keeps dust away from your couch—yes, that’s a win.
7. Personalize Without Clutter
Your corner should feel like you: a reflection of your favorite colors, textures, and motifs. But avoid turning it into a museum of half-finished experiments. Rotate projects, or store completed pieces in a portfolio. A small rotating display can keep you motivated without crowding the space.
Subsection: Color and Mood Cues
– Pick a dominant color for accents (a calming blue or energizing coral).
– Use fabric samples or scrap fabrics as a mini mood board on the wall.
– Choose a scent profile—lavender for calm, citrus for energy—to set the vibe.
8. Soundproofing Lite: It’s Not Messy, It’s Cozy

If you share walls with neighbors or roommates, add a soft rug and some fabric panels to dampen noise. You’ll thank yourself when you’re cutting fabric or hammering a tiny nail for a display stand. It also makes your corner feel cocooned and personal.
9. Smart Organization Tricks
– Clear containers for visibility: see what you have at a glance.
– A tray for loose small items: beads, pins, sequins—nothing rolls away.
– Label, label, label: this saves time and prevents “where did I put that thing?” moments.
Subsection: The Quick-In, Quick-Out System
Keep a small tote or bag with your current project and a few tools. When you need to switch tasks or travel to a friend’s place, you just grab it and go. No need to dismantle your entire corner every time.
10. Tech-Savvy, Tiny-Space Friendly
If you use digital patterns or tutorials, keep a tablet or small laptop on a stand. Wireless connectivity helps you stream lessons without cords snaking everywhere. A compact charging dock keeps cables from tangling. FYI, a tidy tech setup is still a craft corner—just with fewer tangles.
Subsection: Protect Your Finished Work
– Use a spill-proof mat when you’re painting or gluing.
– Store finished pieces flat or upright in a dedicated bin or portfolio.
– Climate control matters—avoid humidity or direct sun on delicate items.
11. Maintenance Rituals That Pay Off
Set 5 minutes at the end of each session to tidy: wipe surfaces, return tools, and re-stack supplies. A tiny cleanup yields big time today and more creative energy tomorrow. It’s not glamorous, but it’s effective. Consistency beats inspiration on days you feel blah.
12. The Tiny Corner, Big Possibilities Mindset
A small craft corner isn’t about cramming more stuff into a room. It’s about carving out focus, joy, and a place where you can experiment without guilt. You’ll hit creative blocks less often when you have a dedicated space to play.
Subsection: Real-Life Quick Wins
– Start with a 2-foot-by-2-foot setup and expand gradually as you learn your workflow.
– Use modular storage that can be reconfigured for different projects.
– Schedule a weekly “craft hour” just for yourself to keep momentum.
FAQ
How much space do I actually need for a tiny craft corner?
You can start with as little as 2 square meters (about 22 square feet). A compact desk, a pegboard, and a rolling cart can create a functional setup. The key is vertical storage and a designated area, not square footage alone.
What if I share my living space with someone else?
Set clear boundaries with a screen or curtain to separate living and crafting zones. Use a rolling cart that you can tuck away when guests arrive. Communicate your schedule so your partner doesn’t feel blindsided by your messy-but-messy-gorgeous hobby.
How can I keep dust off my projects?
Cover projects with a light cloth or use clear plastic sleeves. Clean your space every few days and keep a dedicated dust cloth handy. A little dust is inevitable, but you can minimize it with a quick wipe and a tidy storage plan.
What if I’m short on money for fancy organizers?
Repurpose what you have: shoebox lids as shallow dividers, mason jars for brushes, or a cutlery tray inside a shallow drawer. DIY pegboard is budget-friendly, and paint can transform plain storage into something chic.
How do I prevent my corner from feeling cluttered?
Rotate items out of sight when not in use. Use boxes and baskets with lids, and keep only the essentials visible. A simple rule: if you haven’t touched it in a month, consider storing it elsewhere or donating.
Is it okay to mix different crafts in one corner?
Totally. Start with one primary craft and add a secondary one if you have the space. Just keep the tools for each craft in clearly labeled spots to avoid cross-contamination of glues, paints, or fabrics.
Conclusion
Your tiny apartment doesn’t have to equal tiny creativity. With smart zoning, vertical storage, and a playful eye, you can build a craft corner that feels expansive, not cramped. Start small, iterate fast, and don’t be afraid to switch things up as your projects evolve. FYI, the best part is that you’ll actually want to sit down and make stuff more often. Happy crafting in your compact sanctuary!