
How to Set Up an Aesthetic Craft Corner in a Teen Bedroom

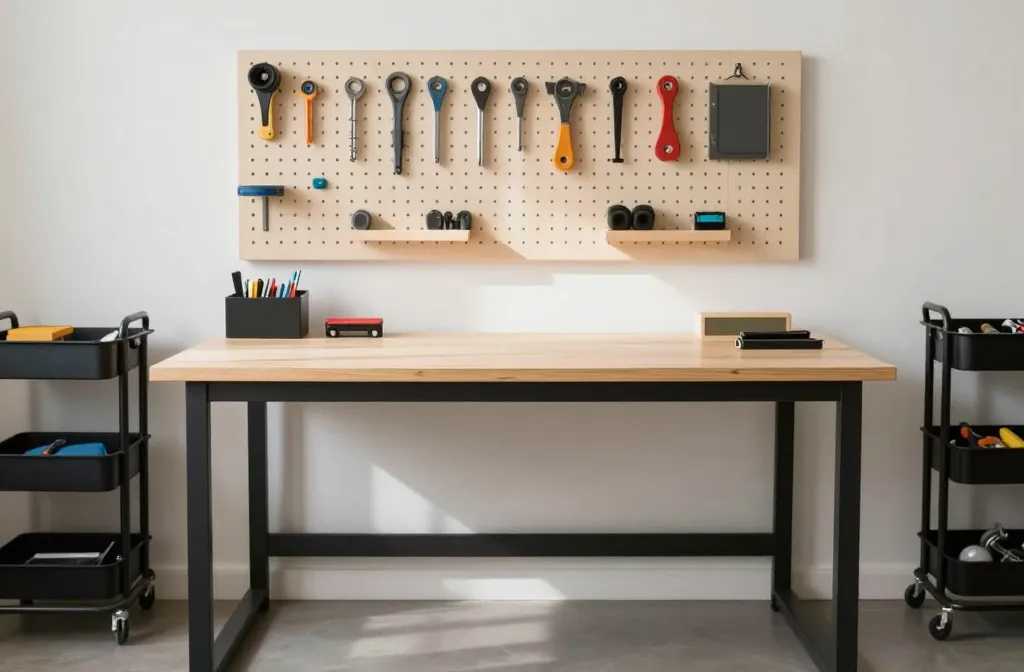
An instant upgrade for a teen bedroom is a craft corner that actually gets used. If your space looks Pinterest-perfect but feels like a museum, this guide helps you make it functional, affordable, and Instagram-worthy without turning your room into a full-time project. Let’s dive into vibes, storage hacks, and easy projects you’ll actually stick with.
Kickoff: Define Your Vibe Without Boring Your Walls
– Start with a quick mood check: what crafts do you actually want to do? Scrapbooking, painting, jewelry making, resin coasters, embroidery, or all of the above?
– Pick one color family and one main accent color to keep things cohesive. You don’t need a rainbow on every surface—trust me, coordination > chaos.
– Decide the “heart” of the corner: a sturdy worktable, a comfy chair, and lighting you won’t curse at after midnight.
Smart, Aesthetic Layout That Actually Works
– Location, location, location: near a window for natural light, but not directly in a glarey sunspot that bleaches your favorite fabrics.
– Use vertical space: pegboard walls or slim wall shelves keep surfaces clear and show off your tools like zen decor.
– Create dedicated zones: a cutting/painting zone, a sewing/stitching nook, and a storage zone. If you have a small desk, use a rolling cart to switch between zones easily.
Pegboard Pros And How To Use Them
– Hang frequently used tools at eye level. Scissors, pliers, brushes, and rulers become instantly grab-and-go.
– Label baskets or cups for tiny items: beads, pins, and clips disappear from the desk and end up where they belong.
– Add a decorative touch with color-coded hooks and a few potted plants to soften the hardware vibe.
Storage That Keeps Your Space Breezy, Not Claustrophobic

– Clear, labeled containers: see-through bins mean you won’t spend 20 minutes digging for the right cord.
– Stackable mysteries solved: clear acrylic organizers stack neatly on shelves without feeling like a storage closet.
– Command center on the back of the door: a small board or pocket system for receipts, project notes, and upcoming to-dos.
Budget-Friendly Picks That Look Expensive
– IKEA trays and baskets dressed with washi tape or fabric can look luxe for a fraction of the price.
– Dollar store finds: small jars with cork tops, chalkboard labels, and magnetic tins on the pegboard for a polished look.
– DIY lamp or bulb color filters: swap bulbs to cast a cozy, craft-friendly glow without buying fancy lighting.
Lighting That Makes Everything Look Better (And Actually Helps Your Crafting)
– Task lighting matters: a lamp with adjustable brightness helps when you’re coloring, sketching, or detailing tiny beads.
– Warm white bulbs create a cozy vibe, while daylight LEDs help ensure colors stay true.
– Consider a dimmer switch or a smart bulb for easy mood shifts when you’re filming a TikTok or just winding down.
DIY Light Touches
– Clip-on clipboards with mini LED string lights for a playful backdrop.
– A small DIY lampshade made from decorative paper or fabric to tie your color story together.
– A subtle neon sign or printed quote adds personality without yelling, “I spent a fortune on this.”
Materials, Tools, And A Quick Shopping List
– A sturdy table or desk with a large surface area.
– Comfortable chair with proper back support; you’ll be surprised how much longer you’ll stay focused.
– A rolling cart or drawer unit to move between zones.
– Basic tools: scissors, ruler, craft knife, hot glue gun (and glue sticks), double-sided tape.
– Storage: small jars, bins, drawers, and a pegboard or wall shelf system.
– Supplies: sketchbooks, papers, paints, brushes, yarn or thread, beads, fabrics, sewing kit, and any specialty items for your favorite crafts.
Want To Go Extra On The Essentials?
– A mini cutting mat that doubles as a cleanable surface.
– A label maker for crisp, clear project organization.
– A reusable tote or apron for carrying supplies to different corners of your room.
Funky Yet Functional Decor For The Craft Corner

– Personal touches: photos, a mini gallery wall of your favorite craft moments, or a rotating mood board.
– A color-blocked wall or framed fabric swatches to visually separate the crafting space from the rest of the room.
– A small plant or air purifier to keep the air fresh after long creative sessions.
What About Sound?
– A tiny Bluetooth speaker or a portable speaker can set the vibe while you work.
– White noise or lo-fi beats help with focus and make the space feel like your own studio.
Practical Projects To Kickstart Your Corner
– Hundred-percent doable DIY coasters: resin, concrete, or tile-based with paint and decoupage.
– Embroidery hoops gallery: switch out designs with seasons or moods.
– Wire and bead jewelry: simple clasps, pliers, and a tray for sorting beads.
– Journal and scrapbook station: a dedicated notebook, washi tape, stickers, and a clean surface.
Simple Resin Coaster Starter Kit
– Gather a small silicone mold, resin, hardener, colorants, and safety gloves.
– Follow the resin instructions precisely; measure twice, mix once.
– After curing, seal with a clear topcoat to prevent scratches. FYI, you’ll want a well-ventilated area.
Maintenance: Keep The Corner Sparkling Without Killing Your Vibe
– Do a weekly reset: wipe surfaces, file away completed projects, and re-stack supplies.
– Clean as you go: dry up spills, return tools to their home, and avoid a clutter avalanche.
– Reassess every month: what’s actually getting used? Move items you love closer to your workspace.
Little Habits That Make A Big Difference
– Put away sharp tools after each use and store hot glue sticks safely.
– Rotate projects so you don’t burn out on one medium.
– Leave space for new ideas; your corner should grow with you, not box you in.
FAQ
How do I choose the right desk height for crafting?
– Your desk height should let your forearms rest comfortably while your hands work. Aim for a 90-degree angle at the elbows when you’re seated, with your feet flat on the floor. If you’re tall, a taller table or an adjustable chair can prevent back strain.
What if I don’t have a big room?
– Start small: a compact corner or a rolling cart that fits under the bed. Use vertical storage proudly, and choose a foldable table that you can stash away. You can still achieve a chic aesthetic with clever organizers and color coordination.
How can I make the space feel more “me”?
– Infuse your personality with color palettes that match your vibe, add photos, favorite quotes, and a rotating mood board. Try a daily or weekly craft feature to keep the energy fresh and you motivated.
What are some budget-friendly project ideas?
– Try DIY coasters from tiles, decoupage on notebooks, or embroidery hoops turned into mini wall art. Reuse old jars for storage, and use washi tape to personalize storage containers. DIY doesn’t have to break the bank.
How do I keep supplies organized long-term?
– Label everything and keep a master list of what you own. Use clear bins for visibility and color-coded labels to speed up finding what you need. Schedule a monthly gear check to purge unused items and restock basics.
Conclusion: Your Craft Corner, Your Style, Your Thrill
Transforming a teen bedroom into an aesthetic craft corner isn’t about spending a fortune; it’s about designing a space that invites creativity and sticks with your routine. Start with a clear vibe, smart storage, and the right light, then fill the space with projects you’re genuinely excited to tackle. FYI, you’ll likely spend more time crafting than scrolling once your setup finally feels like you. Get hands-on, have fun, and let your room evolve with your growing skills and tastes.